The stabilizer hole ticking fix for Durock V2s requires a multi-step diagnostic and modification workflow: identifying wire-to-stem contact via edge-tap testing, performing the Holee Mod with PTFE tape for a durable physical buffer, balancing the wire on a flat glass surface, and applying high-viscosity lubricant such as Krytox XHT-BDZ to wire ends. Lubrication alone is insufficient — a physical barrier inside the stem cavity is the only permanent solution to eliminate metallic ticking noise.
Achieving a silent, premium typing experience frequently demands a precise stabilizer hole ticking fix for Durock V2s to eliminate the persistent metallic clicking that plagues even high-grade builds. As a CompTIA A+ and IT Fundamentals certified Hardware Diagnostics Engineer with hands-on experience across dozens of custom keyboard projects, I have systematically diagnosed this exact issue across a wide range of PCB configurations. The Durock V2 is a remarkable stabilizer by any technical standard — yet even the best hardware exhibits minor tolerance gaps that require deliberate engineering intervention to correct.
This guide is written with the precision of a hardware diagnostic report and the accessibility of a practical workshop manual. Whether you are building your first endgame board or troubleshooting a competition-grade typing instrument, the techniques here will give you a permanent, reliable fix backed by community consensus and engineering logic.
What Exactly Is Stabilizer Ticking on Durock V2s?
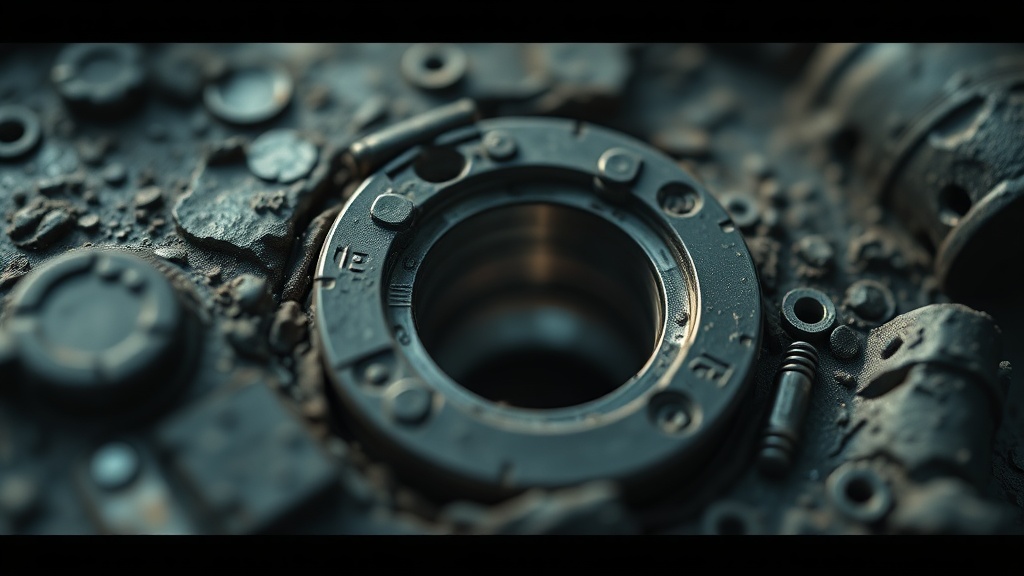
Stabilizer ticking on Durock V2s is a high-pitched, repetitive metallic sound generated when the metal wire makes micro-contact with the internal plastic walls of the stabilizer stem during key actuation. It is mechanically distinct from rattle and demands a different diagnostic and remediation approach.
Before applying any fix, it is critical to understand the root cause at the component level. Stabilizer ticking specifically refers to the auditory signature produced when the metal stabilizer wire strikes the inner cavity of the stem during the downstroke or upstroke of a keystroke. This is fundamentally different from stabilizer rattle, which is caused by the wire striking the outer housing walls rather than the stem itself. Confusing the two leads to misapplied fixes and wasted materials.
The Durock V2 stabilizer is a premium screw-in PCB-mount stabilizer that introduced a “reverse hook” wire-retention design specifically engineered to prevent wire pop-out during aggressive typing. This design improvement addressed the single largest mechanical failure mode of its predecessor. Despite this engineering refinement, the physical tolerances between the wire diameter and the stem hole geometry remain wide enough to allow micro-vibrations when the wire is not perfectly centered or sufficiently cushioned.
From a diagnostics standpoint, ticking is a symptom of excessive radial clearance inside the stem’s internal cavity. The wire, even when properly seated, has a small degree of freedom to oscillate laterally as a key is pressed and released. Under normal typing forces — typically between 40 grams and 80 grams of actuation weight — this oscillation is rapid and produces a frequency in the audible range, experienced as a sharp “tick.” Understanding this physics is the foundation for every effective fix described in this guide.
“The gap between a wire and its stem hole acts like a percussion instrument — close the gap, and you eliminate the instrument entirely.”
— Hardware Diagnostics Engineering Principle, Mechanical Keyboard Tolerances
A key diagnostic technique is the edge-tap test: press only the left or right edge of a stabilized keycap (such as the spacebar, left shift, or backspace) rather than the center. If ticking is localized to one side, that specific stabilizer stem requires attention. This isolates the problem unit immediately without requiring full disassembly of the keyboard.
Pre-Modification Preparation: Cleaning and Assessment
Effective stabilizer modification begins with thorough cleaning of factory oils and a full disassembly inspection. Applying any mod over uncleaned factory lubricant reduces adhesion and leads to mod failure within weeks of use.
Many Durock V2 units arrive from the factory with a thin layer of general-purpose oil applied to the stems and housing. While this provides basic smoothness out of the box, it is chemically incompatible with the precision lubricants used in enthusiast tuning. Hardware engineers with professional diagnostic training consistently recommend cleaning all factory lubricant off stabilizer components before applying any custom modification or lubrication. Skipping this step is one of the most common reasons a Holee Mod or lubrication job fails prematurely.
To clean your Durock V2 components, disassemble the stabilizers completely: separate the housing top from the housing bottom, remove the stems, and extract the wire. Place all plastic components in a small container filled with 90% or higher isopropyl alcohol (IPA). Allow them to soak for 10 to 15 minutes, then agitate gently with a soft-bristle toothbrush. Rinse with fresh IPA and allow all parts to air dry completely on a lint-free cloth before proceeding. Do not use compressed air on wet plastic components, as rapid pressure changes can cause micro-stress fractures in thin walls.
With clean, dry components on your workspace, perform a physical inspection. Check the stem cavity — the hollow channel inside the stem where the wire sits — for any visible burrs, warping, or asymmetry. Durock V2 stems are injection-molded from high-quality POM (polyoxymethylene) plastic, but occasional mold-flash defects can narrow or irregularly shape this cavity. If a burr is found, it can be carefully removed with a fine hobby knife or a needle file, improving fit without any additional padding.
Also inspect the wire at this stage. The keyboard stabilizer wire must be perfectly straight and flat to function correctly. Place the wire on a glass slab, a precision steel ruler, or even a clean phone screen — any optically flat surface works for this purpose. If any section of the wire does not sit flush against the surface, wire balancing is required before proceeding with any other modification step.
Wire Balancing: The Overlooked Foundation
Wire balancing is the process of correcting any warp or bend in the stabilizer wire so it rests perfectly flat on a level surface. A warped wire creates uneven contact inside the stem, making ticking impossible to fully eliminate regardless of what mods are applied.
Wire balancing is the diagnostic step most frequently skipped by enthusiast builders, yet hardware engineers recognize it as the single most impactful intervention for long-term stabilizer performance. A warped wire creates an asymmetric load distribution inside the stem cavity: one side of the wire-to-stem contact point receives more pressure than the other, causing the wire to rock and tick even after extensive lubrication.
To balance a wire, hold it firmly at both ends using two pairs of needle-nose pliers. Apply controlled, incremental bending force in the direction opposite to the warp. The corrections needed are typically sub-millimeter — almost imperceptible visually, but highly significant mechanically. After each micro-adjustment, place the wire back on the flat reference surface and observe whether the gap has closed. This iterative process may require five to ten adjustments per wire.
One practical tip from hands-on diagnostics: warm the wire very slightly by holding it between your fingers before attempting to bend it. The metal becomes marginally more malleable and reduces the risk of creating a new kink. Never use heat guns or open flames near keyboard hardware, as the temperature differentials are uncontrollable at this scale and can damage the wire’s crystalline structure, making it brittle.
Once the wire is balanced, do not reassemble yet. The next step — the Holee Mod — must be performed on the stems while they are detached from the housing.
The Holee Mod: Professional Technique for Permanent Ticking Elimination
The Holee Mod is the gold-standard physical intervention for stabilizer hole ticking, involving the placement of a thin adhesive material strip inside the stem cavity to cushion wire-to-plastic contact. When executed correctly with PTFE tape, it provides a permanent, lubricant-resistant solution.
The Holee Mod is named after its originator in the mechanical keyboard community and has become the most widely adopted technique for addressing wire-to-stem contact ticking. The concept is elegantly simple: place a thin strip of compliant material inside the stem hole so that the wire contacts the material rather than bare plastic. The material absorbs the impact energy, converting it from an audible transient event into silent mechanical deformation.
The choice of material is where professional technique diverges from casual experimentation. Two primary options dominate enthusiast practice:
- Medical-grade adhesive bandage (Band-Aid fabric strip): Widely available, easy to cut, and very compliant. The woven fabric compresses readily under wire contact forces. However, the fabric absorbs lubricant over time, which can cause the adhesive backing to delaminate from the stem wall, requiring periodic replacement.
- PTFE (Polytetrafluoroethylene / Teflon) tape: The superior long-term choice. PTFE tape is chemically inert, does not absorb lubricants, maintains dimensional stability under repeated compression cycles, and has an exceptionally low coefficient of friction. According to material science data available through resources like the Engineering Toolbox, PTFE has a static friction coefficient of approximately 0.04 — among the lowest of any solid material. This makes it ideal for a surface that will be in dynamic contact with a metal wire thousands of times per day.
For the Holee Mod application, follow these precise steps:
- Cut a strip of PTFE tape approximately 8–12mm in length and 2–3mm in width. The exact dimensions depend on the internal diameter of your Durock V2 stem hole — err toward smaller rather than larger to avoid over-tightening.
- Using fine-tipped tweezers, carefully thread the strip through the top opening of the stem cavity.
- Press the strip flat against the interior floor of the cavity — the surface that the wire will rest against during normal seating. Ensure the strip lies completely flat with no folds or creases.
- If using PTFE tape (which is not inherently adhesive without tension), wrap it slightly around the inner walls so it stays in position. If using a Band-Aid strip, the adhesive backing should hold it against the plastic wall.
- Test the stem by inserting the wire end and moving it back and forth. You should feel slight resistance compared to the unmodded stem, but the wire should still move freely without binding. If the wire binds or cannot be inserted, the strip is too thick — reduce it and retry.
The critical diagnostic threshold here is the difference between sufficient cushioning and excessive restriction. A material layer that is too thick will prevent the wire from seating properly in the stem, causing the stabilizer to sit high or return sluggishly. The correct thickness creates just enough interference to eliminate clearance without impeding function. For most builders, two layers of standard PTFE plumbing tape (approximately 0.075mm per layer) provides the correct result.

The Plug the Hole Mod: Advanced Gap Elimination
The Plug the Hole Mod fills the stem cavity void with a small piece of EPT foam or similar compressible material, targeting the vertical movement of the wire within the stem that the Holee Mod alone may not fully address during rapid, heavy typing.
For builders who experience persistent ticking after a well-executed Holee Mod — particularly during high-speed, high-force typing sessions — the Plug the Hole Mod provides a secondary layer of mechanical isolation. Where the Holee Mod addresses lateral wire contact against the stem floor, this technique fills the remaining volumetric void above and around the wire, preventing vertical oscillation.
The material of choice is EPT foam (ethylene propylene terpolymer), a closed-cell foam used in industrial sealing applications. Its closed-cell structure means it does not absorb lubricant, it compresses under load and fully rebounds, and it maintains consistent mechanical properties across the temperature range of indoor environments. Small pre-cut EPT foam pieces designed specifically for this mod are available from several keyboard specialty retailers.
To apply this mod, cut a small piece of EPT foam — approximately 3mm x 3mm x 2mm — and use tweezers to carefully insert it into the stem cavity. It should sit on top of and around the wire once the wire is inserted, compressing slightly to fill the remaining void. The wire must still be removable for future maintenance; the foam should provide compression resistance, not permanent fixture.
Used in combination with the Holee Mod and proper lubrication, the Plug the Hole Mod addresses every mechanical vector of wire-to-stem contact. Builders who have implemented all three techniques consistently report complete elimination of ticking even under extended, aggressive typing sessions. You can also explore keyboard stabilizer mods for related techniques that complement this workflow.
Lubrication Strategy: Selecting and Applying the Right Products
Effective stabilizer lubrication requires different viscosity products applied to different components: Krytox 205g0 for housing sliders and stem walls, and high-viscosity Krytox XHT-BDZ or Permatex Dielectric Grease for wire ends. Applying the wrong product to the wrong surface is a common and consequential error.
Lubrication is the most discussed aspect of stabilizer tuning, yet it is also the most frequently misapplied. The fundamental engineering principle is that different contact surfaces have different tribological requirements — meaning the friction characteristics, load conditions, and desired outcomes differ by location, and therefore the lubricant must differ by location as well.
The following table summarizes the correct lubrication strategy for Durock V2 stabilizers:
| Component / Surface | Recommended Lubricant | Viscosity Grade | Application Method | Key Benefit |
|---|---|---|---|---|
| Housing inner rails / slider channels | Krytox 205g0 | Medium-thin grease | Small brush, thin coat | Smooth, fast stem travel |
| Stem outer walls (slider surface) | Krytox 205g0 | Medium-thin grease | Brush all four sides | Eliminates housing friction |
| Wire ends (legs inserted into stem) | Krytox XHT-BDZ or Permatex Dielectric Grease | Very high viscosity | Coat wire leg generously | Dampens wire vibration |
| Wire center bar (top of wire) | Light coat of 205g0 (optional) | Thin grease | Thin brush pass | Prevents PCB surface rattle |
| Housing screw contact point | None (or minimal 205g0) | N/A | Avoid lubricating screws | Prevents housing rotation |
The most important rule in this table is the separation of lubricant types between the housing/stem contact zone and the wire-end contact zone. Applying thin lubricant like Krytox 205g0 to the wire ends may feel smooth initially, but its lower viscosity allows it to migrate away from the contact surface under repeated cycling, leaving the wire ends unprotected within days. High-viscosity options like Krytox XHT-BDZ or Permatex Dielectric Grease stay in place because their thicker molecular chains resist displacement under the cyclical loading of typing.
Conversely, applying thick grease to the housing slider channels introduces unacceptable hysteresis into the stem return travel, producing the “mushy” keystroke feel that enthusiasts rightly criticize. Over-lubricating any contact surface with too heavy a product is just as detrimental to performance as under-lubricating. Precision in product selection and application quantity is a non-negotiable element of professional-grade stabilizer tuning.
Full Assembly Sequence and Pre-Installation Testing
Assembling modified Durock V2 stabilizers in the correct sequence — clean components, Holee Mod first, lubrication second, wire installation third — and testing before PCB installation prevents costly desoldering work and confirms the modification was executed successfully.
With all individual preparation steps complete, assembly must follow a deliberate sequence to ensure nothing is disturbed or contaminated in subsequent steps.
-
Categories Performance Analysis & Builds