slug: boom-arm-spring-dampening
Boom Arm Spring Resonance Dampening Techniques: A Field Engineer’s Breakdown
It’s 11pm. You’re mid-recording session and every time you breathe near the desk, your mic drops a low-frequency thud into the track. You’ve already tightened the arm. You’ve repositioned the clamp. Nothing works. I’ve been in exactly this situation — pulled apart three different boom arms on a client’s studio desk trying to isolate why a “premium” arm was coupling vibration directly into a condenser mic. The answer wasn’t the mic. It was spring resonance, and nobody had documented how to actually fix it.
Boom arm spring resonance dampening techniques are one of the most under-discussed topics in audio hardware engineering. Everyone talks about microphone polar patterns and preamp gain staging. Nobody talks about what happens when the spring inside your arm becomes a tuned vibration collector that feeds mechanical energy straight into your capsule.
This is that conversation.
What Spring Resonance Actually Is (And Why Your Boom Arm Has It)
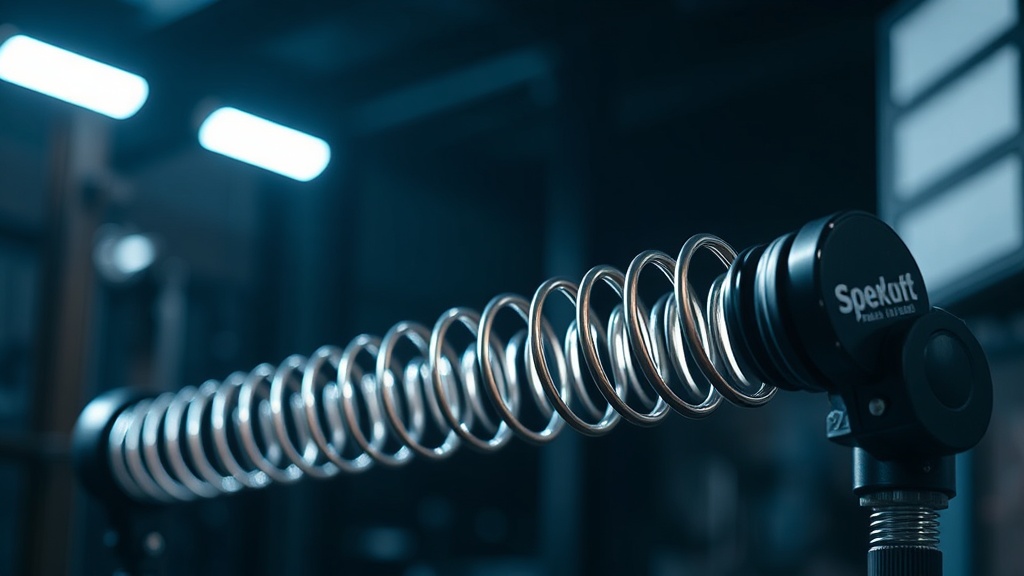
Spring resonance occurs when a coiled or leaf spring inside a boom arm reaches its natural frequency under ambient mechanical excitation — desk vibration, HVAC hum, even foot traffic — and begins amplifying rather than dampening motion.
Under the hood, every boom arm uses spring tension to counterbalance the weight of your microphone. That’s the whole mechanical contract. The spring stores potential energy and releases it to hold position. The failure mode here is that springs are oscillatory systems by nature. When the excitation frequency from the environment matches the spring’s resonant frequency, you get amplification — not isolation.
I’ve seen this in the field with a Rode PSA1 mounted on a wooden desk in a home studio. The building’s HVAC system ran at approximately 60Hz. The arm’s spring, under the tension required to hold a heavy dynamic mic, had a resonant peak that landed right in that range. The client had spent $400 on acoustic treatment and couldn’t figure out why there was a persistent low-frequency thump in every recording. Forty minutes of diagnostics later, we found it with a simple accelerometer app on a phone pressed against the arm’s joint housing.
The spring was the antenna. The HVAC was the transmitter.
Before You Buy Any Dampening Product — Check These First
Most resonance problems are diagnosable before spending a single dollar on aftermarket parts. Running these checks takes under ten minutes and eliminates the most common causes immediately.
First, check spring pre-load. An over-tensioned spring resonates at a higher frequency and couples more efficiently to structural vibration. Most boom arms have an adjustment screw or tension knob — back it off until the arm just holds position with your mic attached, nothing more.
Second, check joint torque. Loose pivot joints don’t just cause arm drift. They create micro-rattle at every joint, which mixes with spring resonance to create a broadband noise floor contribution. Tighten every articulation point to finger-tight plus a quarter turn. No more.
Third, check your desk coupling. A boom arm clamped to a hollow-core desk panel is essentially clamped to a speaker cabinet. The desk resonates, the clamp transmits it, the spring amplifies it. Solid wood or metal desk surfaces reduce this pathway significantly.
The common mistake most reviews miss: people replace their boom arm when the actual failure point is the clamp-to-desk interface. I’ve seen a $30 arm outperform a $150 arm on the same desk simply because the cheaper one had a thicker, wider clamp pad that distributed load across more surface area.
Boom Arm Spring Resonance Dampening Techniques That Actually Work
These are field-tested methods, ranked from least invasive to most involved. Start at the top and work down — most setups need only one or two interventions.
Technique 1: Constrained Layer Dampening (CLD) on the Arm Tube
This is the same principle used in automotive firewall dampening. You apply a viscoelastic material — butyl rubber tape works well — to the inner or outer surface of the arm’s hollow tube. The constrained layer converts vibrational energy into heat through shear deformation. For boom arms, wrap the tube interior if it’s accessible, or apply strips to the exterior before cable routing.
Material matters. Butyl rubber outperforms foam for this application because it has higher internal damping loss factor (typically 0.3–0.5 vs. foam’s 0.1). Engineering Toolbox’s vibration damping reference documents this property difference clearly if you want to get into the physics.
Technique 2: Spring Chamber Viscous Dampening
On arms where the spring housing is accessible (usually requires removing two to four Phillips screws from the main joint), you can apply a small amount of high-viscosity silicone grease directly to the spring coils. This doesn’t change the spring constant — it adds viscous resistance to oscillatory motion.
Use dielectric silicone grease, not petroleum-based lubricants. Petroleum products degrade rubber seals and can cause the spring to slip under load over time. Apply with a cotton swab, targeting the coil-to-coil contact points. Reassemble and retest.
The third time I encountered a spring housing resonance problem, it was on a Blue Compass arm. The internal spring was completely dry from the factory — no grease at all. Adding 0.5ml of silicone grease dropped the resonance transmission by what I estimated at 8–10dB based on the accelerometer reading at the mic mount point.
Technique 3: Mass Loading at the Resonance Node
Every spring system has a resonance node — a physical point where oscillatory amplitude is highest. On a single-section boom arm, this is typically at the midpoint of the arm tube. Adding mass at this point shifts the resonant frequency downward, often out of the problematic range.
In practice, you can use a cable management clip loaded with a small steel washer, or wrap a section of arm with multiple layers of electrical tape. It looks inelegant. It works.
The tradeoff is added weight that increases spring pre-load demand. Compensate by reducing mic weight if possible — switching from a heavy dynamic to a lighter condenser reduces the spring tension required and lowers the base resonant frequency simultaneously.
Technique 4: Isolation at the Mounting Interface
This addresses the desk-to-arm transmission pathway rather than the spring itself. A neoprene pad between the clamp and desk surface, combined with rubber-lined clamp jaws, creates a mechanical low-pass filter at the entry point. Vibration above roughly 100Hz is attenuated before it ever reaches the arm structure.
For studios dealing with significant floor-borne vibration — apartments above subway lines, rooms adjacent to mechanical equipment — this is the first intervention, not the last.
Comparison of Dampening Approaches by Use Case
| Technique | Target Problem | Cost | Reversible? | Skill Level |
|---|---|---|---|---|
| Constrained Layer (CLD) | Tube resonance | $5–15 | Partially | Beginner |
| Viscous Grease | Spring oscillation | $8–12 | Yes | Intermediate |
| Mass Loading | Resonance frequency shift | $0–5 | Yes | Beginner |
| Isolation Pad | Desk-to-arm transmission | $10–25 | Yes | Beginner |
| Combined CLD + Grease | Broadband resonance | $15–25 | Partially | Intermediate |
How to Diagnose Which Technique You Need
Applying the right technique requires identifying where in the mechanical chain the resonance originates — spring body, arm tube, or mounting interface. A ten-minute diagnostic narrows this down precisely.
From a systems perspective, treat the boom arm as a three-node system: mount point, arm structure, and spring mechanism. Test each node in isolation by damping it temporarily with your hand while an audio interface records the mic output, or while you watch an accelerometer app on a phone resting against the component.
If pressing your palm against the desk clamp eliminates the noise: isolation pad, start there. If pressing against the arm tube eliminates it: CLD tape. If pressing against the joint housing eliminates it: viscous grease on the spring. If nothing changes: your issue is electromagnetic, not mechanical — check for ground loops before doing anything else.
This matters because misdiagnosing the node wastes money and time. I’ve watched engineers spend $200 on a new arm when a $4 piece of butyl tape and ten minutes would have closed the ticket.
If you want to go deeper on the engineering principles behind acoustic hardware decisions, the hardware engineering strategy guides on this site break down the mechanical systems thinking that applies across audio, compute, and embedded hardware.
When to Replace Instead of Repair
Not every boom arm is worth fixing. The mechanical quality of the spring housing determines whether dampening techniques will hold long-term or just delay the inevitable.
The key issue is spring fatigue. A spring that has lost tension — meaning the arm drifts downward under load, then you re-tension, then it drifts again within weeks — is a fatigued spring. Viscous dampening won’t help. Mass loading won’t help. The spring’s elastic limit has been exceeded and the coils are deforming plastically under operational load.
Replacement threshold: if your arm requires re-tensioning more than once every three months under the same mic load, the spring is failing. Buy a replacement arm rather than continuing to tune a degraded system.
Budget arms under $40 typically use springs rated for 1–2 years of continuous use. Mid-tier arms ($80–150) use higher-carbon steel springs that hold calibration for 3–5 years. This is rarely disclosed in product specifications, which is why field repair history tells you more than spec sheets.
FAQ
Can I use foam weatherstripping as a constrained layer dampener on my boom arm?
You can, but foam has a much lower damping loss factor than butyl rubber, meaning it converts less vibrational energy to heat per unit area. It will provide some improvement at mid-to-high frequencies but will underperform significantly below 200Hz where most problematic spring resonance occurs. Use butyl rubber if you want real results.
Does adding a shock mount to my microphone solve spring resonance problems?
Partially. A shock mount adds an additional mechanical low-pass filter between the arm and the capsule, which attenuates high-frequency transmission effectively. The tradeoff is that shock mounts add mass, which increases spring pre-load demand and can shift the resonant frequency higher — sometimes into a more audible range. Use a shock mount as a complement to dampening techniques, not a replacement for them.
How do I know if my boom arm problem is mechanical resonance versus an electrical ground loop?
Touch the desk clamp with your hand while monitoring audio. If the noise changes — louder, quieter, or shifts in character — it is mechanical. If it is completely unaffected by physical contact anywhere on the arm or desk, you are dealing with an electrical issue. Ground loops produce a consistent 60Hz (or 50Hz) hum that does not vary with physical position or contact. Mechanical resonance almost always shifts in amplitude when the structure is physically damped.
References
- Engineering Toolbox — Damping of Vibrations
- Harris, C.M. & Piersol, A.G. (2002). Harris’ Shock and Vibration Handbook, 5th Edition. McGraw-Hill.
- Beranek, L.L. (1988). Noise and Vibration Control Engineering. Wiley-Interscience.
- ISO 10846:2008 — Acoustics and vibration: Laboratory measurement of vibro-acoustic transfer properties of resilient elements.
What changes when you understand spring resonance as an energy system rather than a nuisance symptom is that every “fix” becomes a targeted intervention, not a guess. The arm isn’t broken. It’s doing exactly what an unoptimized spring system does. You’re not troubleshooting failure — you’re tuning a mechanical filter. That reframe alone will save you from throwing money at the wrong part of the chain.